Making roses without cutters
Hi everyone.. sorry for not updating this blog more often. Please subscribe to my RSS feed if you haven’t done so. Anyway, today I was fasting (ada gak rasa macam nak pengsan, baru 1st day ganti ! ) so I was quite tired and free of cooking. Took out my gumpaste and started making these roses. I can assure you this technique is so much easier than the Wilton technique. You need only the calyx cutter. Ok, here’s the step by step tutorial.
First, make a cone shape from your gumpaste.

Then, for the petal, make a small ball.

Pinch to flatten it, making sure the edges are thin. Rub your fingers with shortening when doing this.

Brush a little water at the bottom and stick it to the cone. Try to cover the whole tip.


This is the first layer. The layering part is quite easy to remember. You will need :
1st layer - 1 petal
2nd layer - 2 petal
3rd layer - 3 petal
4th layer - 4 petals. All together, 10 petals.
My second layer is completed :

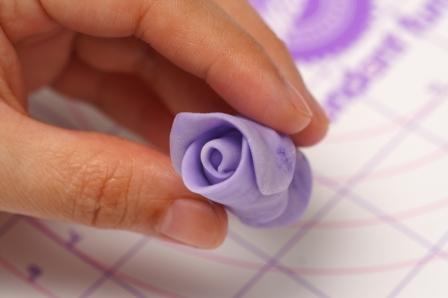
Continue till the 4th layer. Or you could stop here to make a bud.
Now, for the calyx you will need to use a cutter. If you don’t have any, you could just cut out the shape with a craft knife.

I use my fingers to pull and thin the calyx.
 Brush some water and glue it to the base of the rose. Before that, pinch out the excess cone at the bottom of the rose.

So here’s the completed flowers.

Just leave it to dry, it can stand on its own due to the cone shape beneath. I like using this technique, its fast and easy. Probably most of you already know how to do this, but I still hope this tutorial will be useful to the newbies.
Time to sign off, thanks for stopping by and … smile ! Tomorrow’s Friday ! 